Wednesday, November 12, 2014

Action Wobbles: Anything Goes!!

Hello Crafty Friends!  I have been MIA for a long time (about a year, eek!) and I thought joining a fun challenge would get me back into blogging and help get my Christmas cards done would be the best of both worlds =)   So here goes, I have been using this snowman die set by Stamps of Life for most of my Christmas cards and I thought it would be so much fun and cute to add an
Action Wobbler to one of them.

I've been trying my best to use all my paper stash especially my 12x12 paper stacks that are so heavy and take too much space.  So most of the glitter paper came from various paper stacks by DCWV. 

As you may know it's always tricky to adhere things onto glitter, I found that Stotch  Quick Dry Adhesive works really good.

Mr. Snowman's nose was debatable on so many levels, I first started out with no nose and then he looked so plain so -- after much feedback from family and friends I created him a nose.  Pretty much out, the noses were made free hand as the die set didn't come with a carrot nose and I couldn't stamp the nose onto the glitter paper. 
To make the nose I got an extra piece of white cardstock, used the orange from the Tim Holtz Distress Mini Ink Page Kit 1 cut out what looked like a carrot to me and put orange Stickles on it. When the Stickles dried though, I really didn't like how it came out, so I added Glossy Accents on top of it and that's when I was happy with the outcome of Mr. Snowman. 

Here's the finished card.  The eyes, mouth and buttons came from punching holes (from my Crop-a-dile)  into the same black glitter paper used for his hat by DCWV from The Twinkle Glints Stack
http://handmadebymina.blogspot.com
 Here's a quick video showing the cute guy wobbling, nothing too fancy but it was so much fun!!


Wednesday, June 5, 2013

Broadway Nails imPRESS

Good morning Friends!  I wanted to share a product I got to test out this week.  It is Broadway Nails  imPRESS, a Press-on Manicure with no gluing.  The packaging is cute, it looks like you are getting a bottle of nail polish but really you get a full set of painted nails!  So fun!
It did take me awhile to find the correct sizes for my nails but once I got a hang of it, it went by real quick!  It also saved me a trip to the salon so I got to save some money this week.

Pros: Easy and Fun!
Cons: Not too many small nail options

Retail Price: about $5-7, I'd normally pay about $20 at the salon!

Here's a picture of the completed manicure, and now I'm ready for SUMMER!? 
More Information: 
Broadway Nails: Press-on Manicure: Nicole Scherzinger Signature Series
Model Number: BIPD09X
Type Name: Sexy Fresh 

Friday, April 19, 2013

April Baby Showers

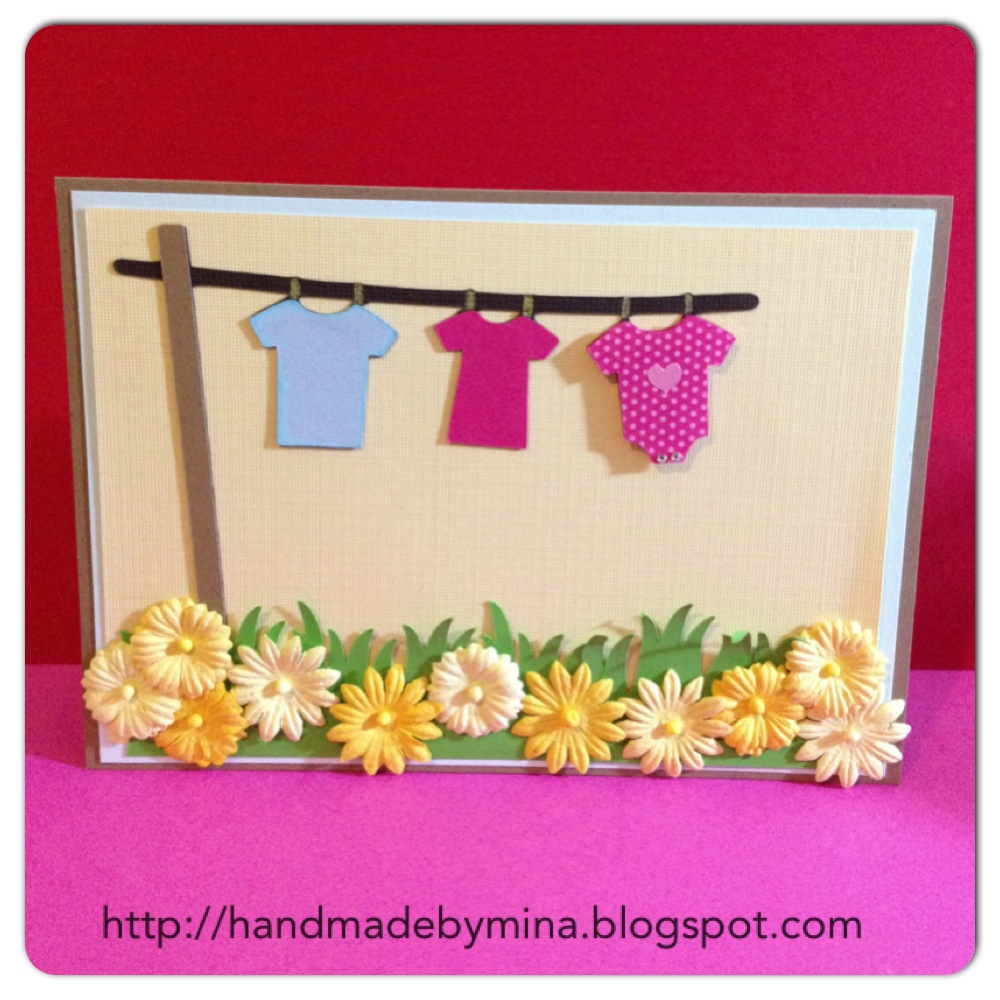
Good friends of mine are expecting a baby girl.  I wanted to make a cute card for their baby shower. 
I cut the the clothes line and clothes from Cricut Cartridge, Straight from the Nest.  The grass was cut using the Cricut Cartridge, Plantin School Book. 
I wanted the onesie to standout the most so I cut it out using patterned paper, added a heart sticker from my stash and little rhinestones as the buttons. I also put the onesie on foam squares to standout more.
I also wanted the Mommy shirt to stand out so I stamped it with a stamp from the
 Our Mothers stamp set  by Pink by Design . 

I didn't want to leave the Daddy shirt out, so I inked it up a little. 
I wanted the clothes pins to show better so I colored them with a gold pen.
Hope you enjoyed my card. 
Challenge(s):

Monday, April 15, 2013

April Showers

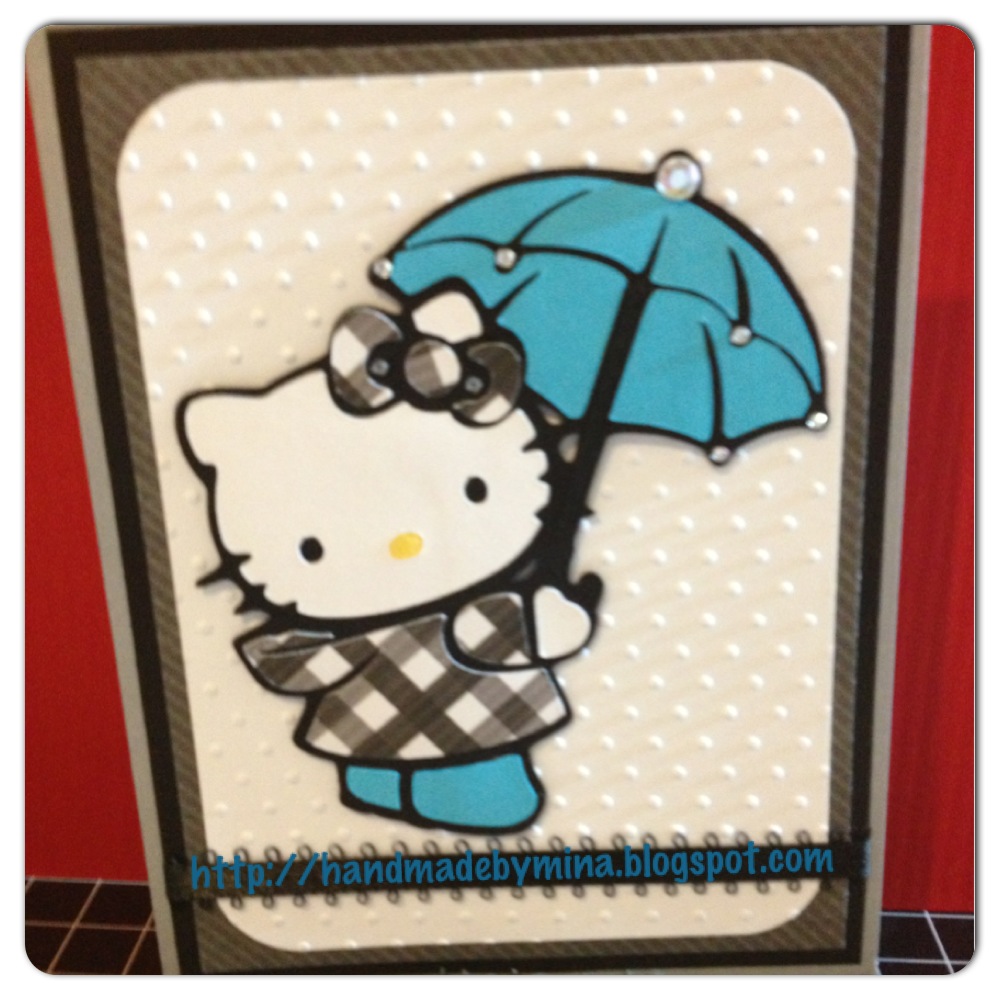
Hello Crafty Friends!  Back with a fun card with one of my favorite Cricut Cartridges, Hello Kitty Greetings.
 The whole card was made using DCWV and Recollections papers.  Bling is also by Recollections.
 Background was run through the Cuttlebug using the Swiss Dots embossing folder.
 I also put grey bling in her bow by Recollections
The insde is stamped with a stamp by Pink by Design.
I Glossy Accented her nose and her boots :) Ribbon was from my stash purchased at Michaels.

Challenge(s):

Friday, April 5, 2013

Clowning Around with Sparkle and Shine

Hello Crafty Friends!  I've been working on a project this week that I'd love to share with you.  A couple week ago my boyfriend gave me a surprise, a Cricut - Cartridge: Teddy Bears Parade I  was so excited and more excited I had chance to finally use it.
I made this cute little guy and the truth it took me a long time but I think he came out sooo... cute. The patterned paper is all DCWV, mostly from the Kidlet stack. All the solid cardstock is by Recollections. I altered his nose inking his nose red with Distress ink and then Glossy Accented his nose, and let it dry 
overnight. 

I used black Stickles on his shirt and fine glitter by Martha Stewart for his ruffle. 

I added Glossy Accents on the dog-shaped balloon, I really wanted it to have a balloon look to it :)
Ribbon is by American Crafts (from the Dear Lizzy collection)  and bakers twine with gold sparkle (from the Target dollar bin).
I made a 5x7 card and I cut the Circus Tent using my cameo out of an SVG. The green tinsel glitter on the circus tent is by Martha Stewart.  I punched the border with a punch by Martha Stewart.  Happy Birthday sentiment is by Pink by Design.

Hope you enjoyed my card.  Happy Crafting! 

Challenge(s): 


Tuesday, April 2, 2013

All About Spring

Hello Crafty Friends!  I don't know about you but I love Spring!  I made this cute banner just for Spring .
I've been really into banners lately and enjoying die cuts in a larger scale.  The phrase and scalloped circles was cut using Cricut Cartridge Birthday Bash and the butterflywas from Create a Critter.

I asked my crafty IG friends if the clothes pins should stay or go and the clothes pins lost this time but I think it was a good loss since with the clothes pins the banner got too busy.

The bottom was punched using a Martha Stewart punch. I inked the scalloped using distressing ink (Antique Linen) and embossed each letter using a Sizzix embossing folder. I used foam squares in back of the scalloped circle as well as the letter for added dimension. 


Hope you enjoyed this project.


Wednesday, March 27, 2013

Minnie Mouse and SuperHeros

Hello Crafty Friends!! I was so swamped (I started this post on the week of March 10). :) I helped with 2 birthdays that fell on the same day 60+ miles away from each other and I attended both!  I think that deserves Auntie of the year, lol.
I made these Paper Heroes for my nephew, Jayson's 4th Super Hero Birthday Party, they were very time consuming.  They all too 1.5 hours or more and I didn't even have all done by the party.  I printed them from http://mypaperheros.blogspot.com.
Here is the Heros with the birthday cake and other desserts that family made.
Here is Jayson's SuperHero (altered) banner.  We used this same banner from last year also with Cars theme.  I simlply took off Lightning McQueen and Mater and personalized it with SuperHeroes.
The other birthday party was also for another 4 year old birthday party.  My bestie's daughter, Kaycee turned four and celebrated with a Minnie Mouse themed party.
This was Kaycee's banner I made.  I actually made it last year and this year we made revisions so that it would follow the theme.
These Minnie ears were used for the centerpieces for tables.  I used the Mickey and Friends Cricut Catridge and the Swiss Dots Cuttlebug embossing folder.
Ths is how the centerpieces were assembled, very simple yet cute.
This Minnie was used as wall decor, cut at 10 3/4 inches.
 This was Kaycee's candy bar, very cute, huh?!  Her Mom did a great job setting up . 
Hope you enjoyed my post crafty friends.

Have a good one.

xoxo
Mina