Wednesday, June 5, 2013

Broadway Nails imPRESS

Good morning Friends!  I wanted to share a product I got to test out this week.  It is Broadway Nails  imPRESS, a Press-on Manicure with no gluing.  The packaging is cute, it looks like you are getting a bottle of nail polish but really you get a full set of painted nails!  So fun!
It did take me awhile to find the correct sizes for my nails but once I got a hang of it, it went by real quick!  It also saved me a trip to the salon so I got to save some money this week.

Pros: Easy and Fun!
Cons: Not too many small nail options

Retail Price: about $5-7, I'd normally pay about $20 at the salon!

Here's a picture of the completed manicure, and now I'm ready for SUMMER!? 
More Information: 
Broadway Nails: Press-on Manicure: Nicole Scherzinger Signature Series
Model Number: BIPD09X
Type Name: Sexy Fresh 

Friday, April 19, 2013

April Baby Showers

Good friends of mine are expecting a baby girl.  I wanted to make a cute card for their baby shower. 
I cut the the clothes line and clothes from Cricut Cartridge, Straight from the Nest.  The grass was cut using the Cricut Cartridge, Plantin School Book. 
I wanted the onesie to standout the most so I cut it out using patterned paper, added a heart sticker from my stash and little rhinestones as the buttons. I also put the onesie on foam squares to standout more.
I also wanted the Mommy shirt to stand out so I stamped it with a stamp from the
 Our Mothers stamp set  by Pink by Design . 

I didn't want to leave the Daddy shirt out, so I inked it up a little. 
I wanted the clothes pins to show better so I colored them with a gold pen.
Hope you enjoyed my card. 
Challenge(s):

Monday, April 15, 2013

April Showers

Hello Crafty Friends!  Back with a fun card with one of my favorite Cricut Cartridges, Hello Kitty Greetings.
 The whole card was made using DCWV and Recollections papers.  Bling is also by Recollections.
 Background was run through the Cuttlebug using the Swiss Dots embossing folder.
 I also put grey bling in her bow by Recollections
The insde is stamped with a stamp by Pink by Design.
I Glossy Accented her nose and her boots :) Ribbon was from my stash purchased at Michaels.

Challenge(s):

Friday, April 5, 2013

Clowning Around with Sparkle and Shine

Hello Crafty Friends!  I've been working on a project this week that I'd love to share with you.  A couple week ago my boyfriend gave me a surprise, a Cricut - Cartridge: Teddy Bears Parade I  was so excited and more excited I had chance to finally use it.
I made this cute little guy and the truth it took me a long time but I think he came out sooo... cute. The patterned paper is all DCWV, mostly from the Kidlet stack. All the solid cardstock is by Recollections. I altered his nose inking his nose red with Distress ink and then Glossy Accented his nose, and let it dry 
overnight. 

I used black Stickles on his shirt and fine glitter by Martha Stewart for his ruffle. 

I added Glossy Accents on the dog-shaped balloon, I really wanted it to have a balloon look to it :)
Ribbon is by American Crafts (from the Dear Lizzy collection)  and bakers twine with gold sparkle (from the Target dollar bin).
I made a 5x7 card and I cut the Circus Tent using my cameo out of an SVG. The green tinsel glitter on the circus tent is by Martha Stewart.  I punched the border with a punch by Martha Stewart.  Happy Birthday sentiment is by Pink by Design.

Hope you enjoyed my card.  Happy Crafting! 

Challenge(s): 


Tuesday, April 2, 2013

All About Spring

Hello Crafty Friends!  I don't know about you but I love Spring!  I made this cute banner just for Spring .
I've been really into banners lately and enjoying die cuts in a larger scale.  The phrase and scalloped circles was cut using Cricut Cartridge Birthday Bash and the butterflywas from Create a Critter.

I asked my crafty IG friends if the clothes pins should stay or go and the clothes pins lost this time but I think it was a good loss since with the clothes pins the banner got too busy.

The bottom was punched using a Martha Stewart punch. I inked the scalloped using distressing ink (Antique Linen) and embossed each letter using a Sizzix embossing folder. I used foam squares in back of the scalloped circle as well as the letter for added dimension. 


Hope you enjoyed this project.


Wednesday, March 27, 2013

Minnie Mouse and SuperHeros

Hello Crafty Friends!! I was so swamped (I started this post on the week of March 10). :) I helped with 2 birthdays that fell on the same day 60+ miles away from each other and I attended both!  I think that deserves Auntie of the year, lol.
I made these Paper Heroes for my nephew, Jayson's 4th Super Hero Birthday Party, they were very time consuming.  They all too 1.5 hours or more and I didn't even have all done by the party.  I printed them from http://mypaperheros.blogspot.com.
Here is the Heros with the birthday cake and other desserts that family made.
Here is Jayson's SuperHero (altered) banner.  We used this same banner from last year also with Cars theme.  I simlply took off Lightning McQueen and Mater and personalized it with SuperHeroes.
The other birthday party was also for another 4 year old birthday party.  My bestie's daughter, Kaycee turned four and celebrated with a Minnie Mouse themed party.
This was Kaycee's banner I made.  I actually made it last year and this year we made revisions so that it would follow the theme.
These Minnie ears were used for the centerpieces for tables.  I used the Mickey and Friends Cricut Catridge and the Swiss Dots Cuttlebug embossing folder.
Ths is how the centerpieces were assembled, very simple yet cute.
This Minnie was used as wall decor, cut at 10 3/4 inches.
 This was Kaycee's candy bar, very cute, huh?!  Her Mom did a great job setting up . 
Hope you enjoyed my post crafty friends.

Have a good one.

xoxo
Mina


Tuesday, March 19, 2013

Embossed Birthday Banner


Hello again Crafty Friends!  I made this banner for my friend's son's 1st birthday. I think it came out so cute. I usually start off assembly line style to make things easier.  So First I cut all my materials using the Birthday Bash Cricut Cartridge. 

I embossed all the letters using my Cuttlebug and Swiss Dots embossing folders. I inked all the edge of the banner.  I used many different papers from Recollection, Paper Studio and DCWV.

This baner came out very well with a lot of dimension. All the letters were placed on dimensionals. 
Thanks for stopping by, hope you enjoyed my project.

Challenge: Monday Challnge #91 - Embossing or Glossy Accents


Monday, March 18, 2013

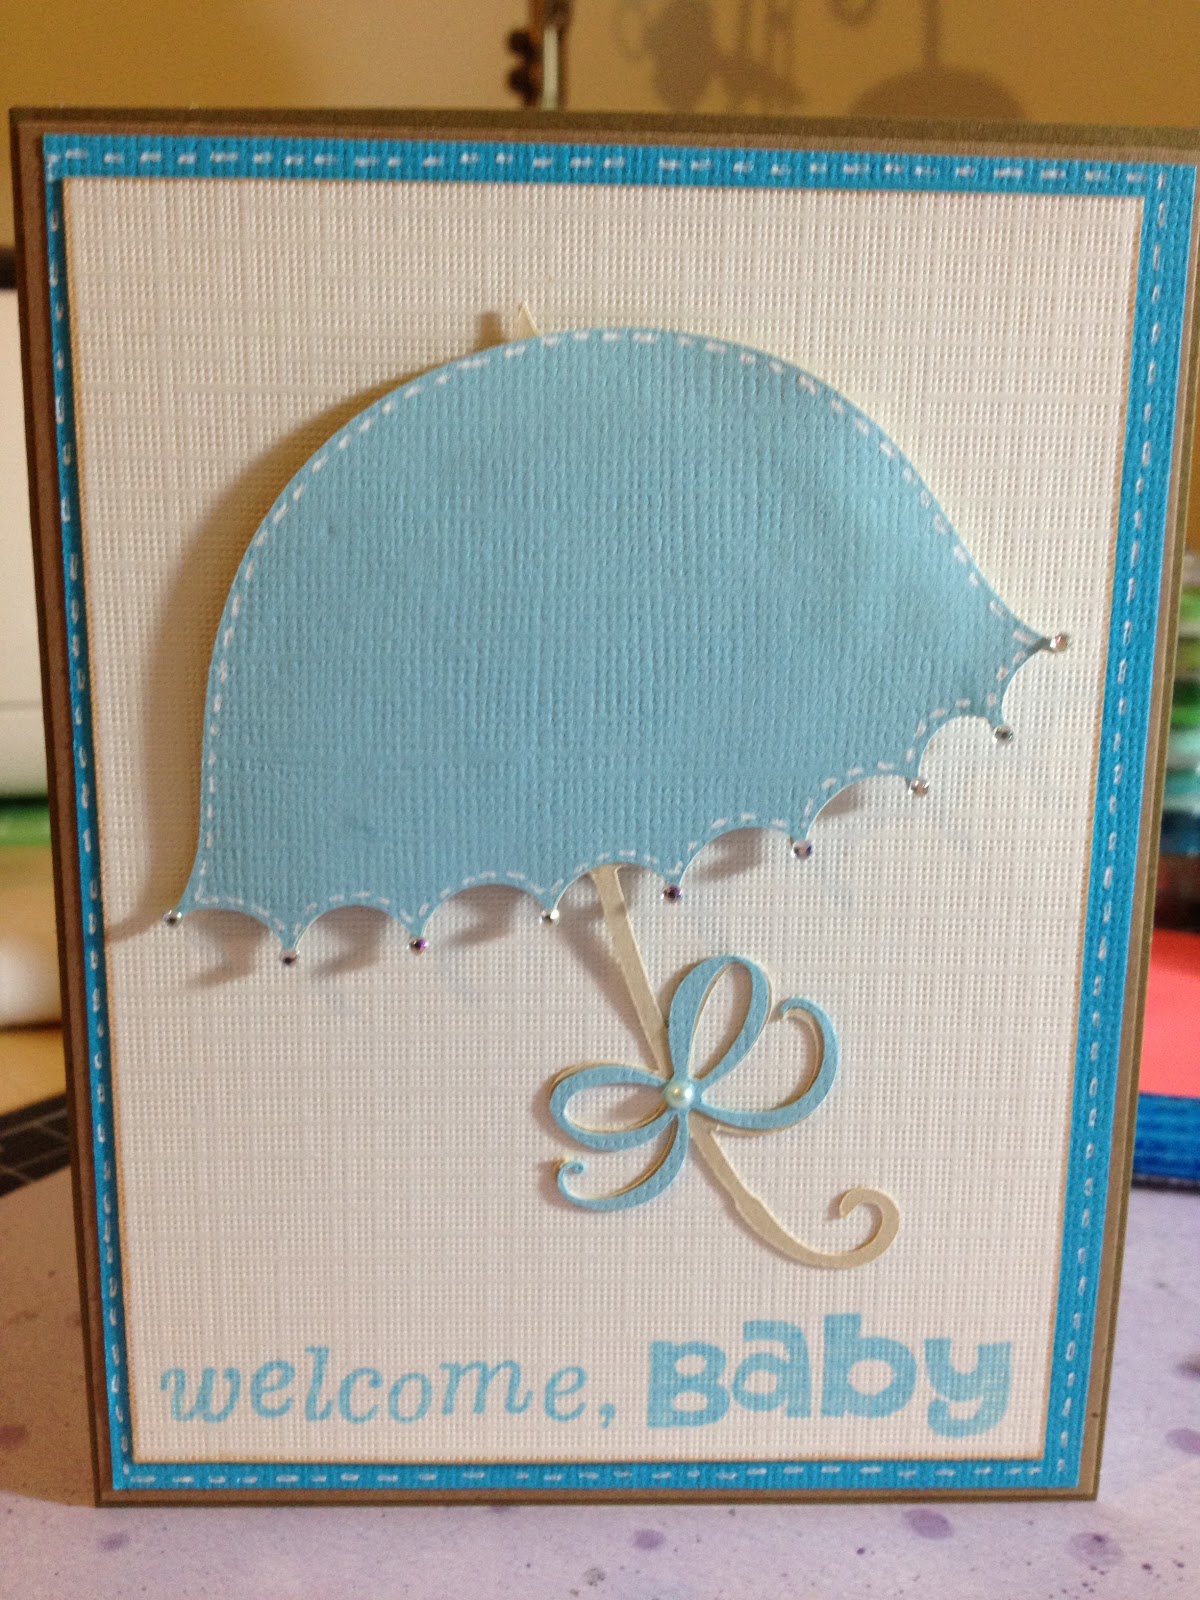
Sweet Baby

Hello Crafty Friends!  Who doesn't get excited when a baby is on the way?  I made this for a Baby Shower for my boyfriend's cousin.


I used the New Arrival Cricut Cartridge for the umbrella.  All of the cardstock is either Recollections or Paper Studio.  I faux stitched with my white pen,added some bling to replicate an umbrell and added a pearl to the ribbon.  The stamp is by Inkadinkadoo.

Hope you enjoyed my card.

Thursday, March 7, 2013

Lucky Shamrock

Good Aftenoon Everyone,
I wanted to share a card I made. I used the Simply Charmed Cricut Cartridge to cut the leprechaun and I cut him at 3 1/4 inches.  He is made up of all Recollections cardstock and googley eyes in place of paper pierced eyes.
The green mat and pink scalloped strip is by DCWV.  The pot of gold is also cut with Recollections.  The seniment 'Make your own Luck' and the stamped four-leafed clover is stamped using a Die-namics stamp set called Masculine Graphic Tee.  I heat embossed the four-leaf clover with green embossing powder.  For some extra fun I placed an Action Wobble behind the leprechaun. Ribbon is by American Crafts - Dear Lizzy collections.
The Action Wobble made him extra cute and interactive for whomever gets this card.
For a little bling I glittered the buckle and button slightly.

Hope you enjoyed my card and Happy early St. Patrick's Day!
Ps/ Don't forget the corned beef :)
xoxo,
Mina


Saturday, March 2, 2013

Make a Wish

Hello Crafty Friends!  I hope you are having a great weekend, it was a pretty sunny day today so I spent a lot of it outside, I'm in Southern California if I've never mentioned that before.

I made a card for my nephew in Chicago who just turned one.
The base of the card is Recollections, the blue mat is from DCWV and the top mat is from a book of designer papers I've had in my stash for a very long time (the texture is like gift wrap).  
I cut the monkey from the Create a Critter Cricut Cartridge and the Make a Wish sentiment was cut using the Create a Critter 2 cartridge using the Phrase function.  For the monkey, I excluded one of the top layers and stamped the monkey's cute face using a Peachy Keen stamp.  
 The cake sticker is by Recollections.  The garland was pre-made by Colorbok from the Antique Paper collection.  I put some Alphabities by Provo Craft of H1BD for Happy 1st Birthday.  I was really debating but there was nothing I could think of that was 4 letters so I thought this could work. 
For the sentiment, I stamped happy birthday inside and heat embossed it. the stamp is by Fiskars: All Year Cheer. 

Happy Crafting!

Challenge:


Friday, February 22, 2013

Spring is in the Air...

Good morning Scrappy Friends, spring is in the air and the flowers are blooming! I'm here sharing a card I made from a request from my Aunt, a card for her sister. The perfect sentiment came from the Pink by Design stamp set 'Sibling Love.'
This is an A2 sized card, the flowers are from My Creative Time, Flower Petal Dies and placed with dimensionals.  The brads are by Recollections and the ribbon is fom American Crafts.
All the cardstock is from Recollections and I 'Inked it Pink' ;) using a pink ink pad  I had in my stash. Lastly, the border punch is by ek success.
Hope you enjoyed my card.  Till next time Scrappy Friends!  Have a great weekend!

xoxo
Mina

Challenges: 
Pink by Design: Ink it Pink: In the Garden Challenge
My Craft Spot: #87 - Flowers


Thursday, February 21, 2013

My Birthday Month Too...

Good morning Scappy Friends!  I just wanted to share with you a purple/amethyst birthday cake card I made. .  Upon looking through my stash I found a paper pack that was purple and decided I wanted to make a cake that looked like a cake of fondant.  I think it came out pretty nice.

The birthday cake came from the Cricut Cartridge: Wrap It Up, page 31 and was cut at 5 inches.  I ran the base  portion through my Cuttlebug (portion of the candles only though) using my Swiss Dots embossing folder.  I heat embossed the yellow first and then put some red embossing on top of that and this was the outcome.
For my sentiment I used the Teeny Tag Greeting Stamp Set by My Creative Time.  I pierced the base and used this Purple Recollections brad I had.

The paper I used was from the Holly Robinson Peete collection, didn't know she was a paper enthusiast.   =) 
Hope you enjoyed your February!  Happy Birthdy to all the February babies out there, hope you had a good one.
xoxo,
Mina
Challenges: